 PA Trace for live sound
Measurement microphone calibration
"Calibration" means two different things for a measurement microphone. An SPL calibration tells the analyzer how loud 0 dBFS is, so it can read dB SPL. A correction file flattens the microphone's own frequency response. They solve different problems, and a transfer function needs neither for most tuning work.
Updated 17 November 2026
Which measurements need it
| Measurement | SPL calibration | Correction file |
|---|---|---|
| Transfer function for EQ and alignment | No: it is a ratio of two inputs | Helpful, mostly above 10 kHz |
| SPL meter, show logging, level limits | Yes | Not used by most SPL meters |
| RTA in dB SPL, noise surveys | Yes | Helpful |
| Speech intelligibility (STI) with real noise | Yes | Helpful |
SPL calibration with an acoustic calibrator
A microphone and interface deliver a level in dBFS, relative to the converter's full scale. Nothing in that number says how loud the room is: it changes with the preamp gain. An acoustic calibrator plays a known level, usually 94 dB SPL (a pressure of 1 Pa) or 114 dB SPL at 1 kHz, into the microphone. The analyzer reads what dBFS that produces and from then on knows which dB SPL corresponds to 0 dBFS on that input.
- Set the preamp gain where you will use it. Every change of gain after calibration makes the reading wrong.
- Put the calibrator on the microphone and switch it on.
- Start the calibration in the analyzer with no frequency weighting, and wait until the reading is steady.
- Confirm the reference level (94.0 or 114.0) and apply.
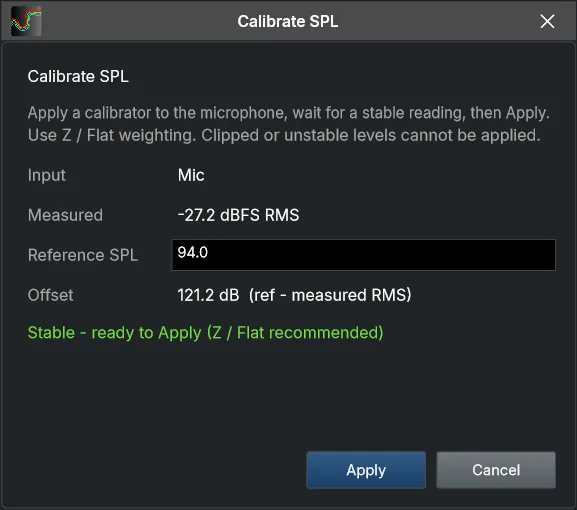
Calibrate at the start of each day, after moving the microphone to another input, and after any change of interface gain. Calibrate with the weighting off: a calibration taken through A or C weighting is wrong at every frequency except 1 kHz, and that is easy to forget.
Microphone correction files
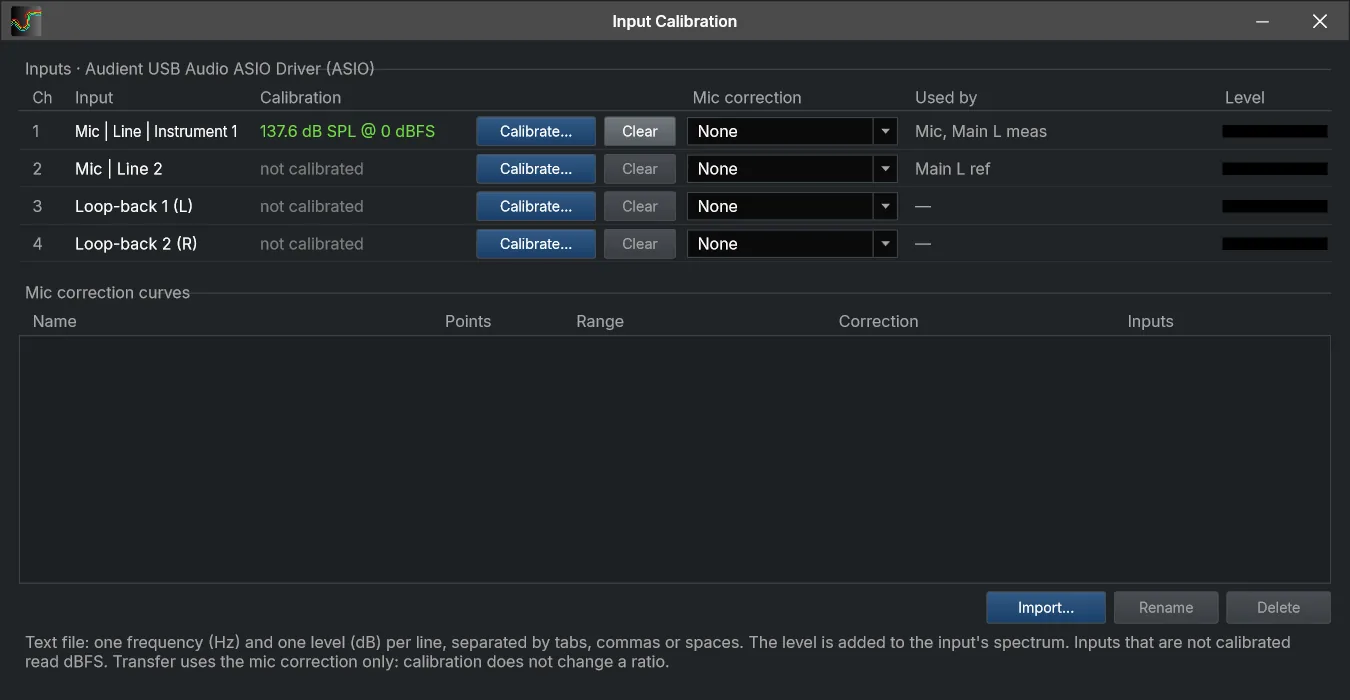
Many measurement microphones come with a file of their individual response, measured by the maker or a lab. The analyzer adds the inverse of that response to the input, so the microphone reads flat. Budget measurement microphones benefit most, usually above 10 kHz, where their response rises or falls by a few dB.
The format is simple: one frequency in Hz and one level in dB per line. Files ending in .txt, .csv, .frd, .cal or .mic all follow it, with tabs, commas, semicolons or spaces between the columns. A header line such as the "Sens Factor" line of a UMIK file is skipped.
- Use the file that belongs to your microphone's serial number. Another unit of the same model can differ by a dB or two at the top.
- Some makers supply two files, for sound arriving on axis (0°) and from the side (90°). Use the one that matches how you point the microphone; pointed at the loudspeaker, that is 0°.
- In a transfer function, a correction on the measurement input is added and one on the reference input is subtracted. Put the file on the microphone's input, not on the reference.
What calibration cannot do
- A calibrated measurement microphone and a laptop are not a type-approved sound level meter. Use them for monitoring and documentation; where a regulation requires a certified instrument, use one.
- The accuracy of an SPL reading depends on the microphone, its calibration and the calibrator. A calibrator that has not been checked in years is part of your error.
- A correction file fixes the microphone, not the room. It will not make a measurement at a bad position any better.
In PA Trace: Config > Input Calibration lists every input. Calibrate... runs the SPL calibration; Import... adds a correction file to the library, and the Mic correction column applies it. The SPL meters use the input's calibration but not its correction curve.
Related guides
- Measurement setup Microphone, interface, where to take the reference, and the levels that make a measurement trustworthy.
- SPL monitoring dBA or dBC, Fast, Slow or Leq, and how to log a show so the numbers hold up when someone asks.
- Using an RTA What a real-time analyzer is good for at a gig, from ringing out feedback to checking a mix, and what it cannot do.
- Room acoustics: RT60 and STI Read the impulse response, measure reverberation time, clarity and speech intelligibility, and find the surface behind a reflection.