 PA Trace for live sound
How to EQ a PA system
System EQ is the last step of a tuning, not the first. Once the boxes are aimed, timed and in polarity, EQ corrects the tonal balance the audience hears. The hard part is not placing filters; it is deciding which features of the measurement are real for the whole room and which belong to one seat.
Updated 17 November 2026
Before you touch EQ
A cancellation looks like an EQ problem and is not one. A deep, narrow dip from two sources out of time, or from a reflection, does not fill when you boost it; it only wastes headroom. So EQ comes after level and aim, the main system delay, subs to mains, and fills and delays. If you skipped those, go back to the order of work.
Step 1: measure several positions
One microphone position shows one seat, with that seat's reflections and room modes. EQ for it fixes that seat and can make others worse. Measure three to eight positions across the coverage of the source you are tuning, with the same settings, and name each capture by its position.
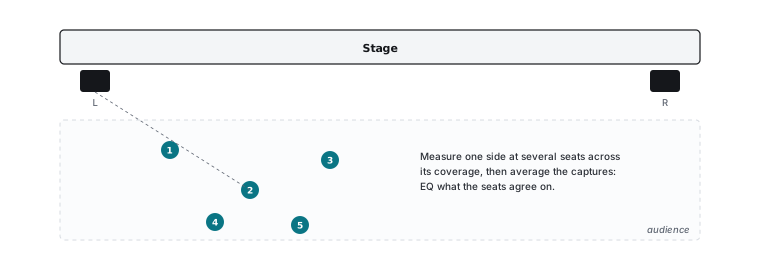
- For a symmetrical left and right system, measure one side. The other is its mirror.
- Spread the positions front to back and on and off axis. Avoid the exact center line between left and right, where the two systems interfere.
- Keep the microphone at ear height, away from seat backs and walls.
Step 2: average, and look at the spread
Average the captures into one trace. Weighting each position by its coherence helps: a seat with a reflection notch then counts less at that frequency. Then look at how far the positions disagree. Where the spread is narrow, the seats agree and an EQ move helps all of them. Where it is wide, an EQ move helps some listeners and hurts others: leave it, or fix the cause with aim or placement.
Step 3: choose a target
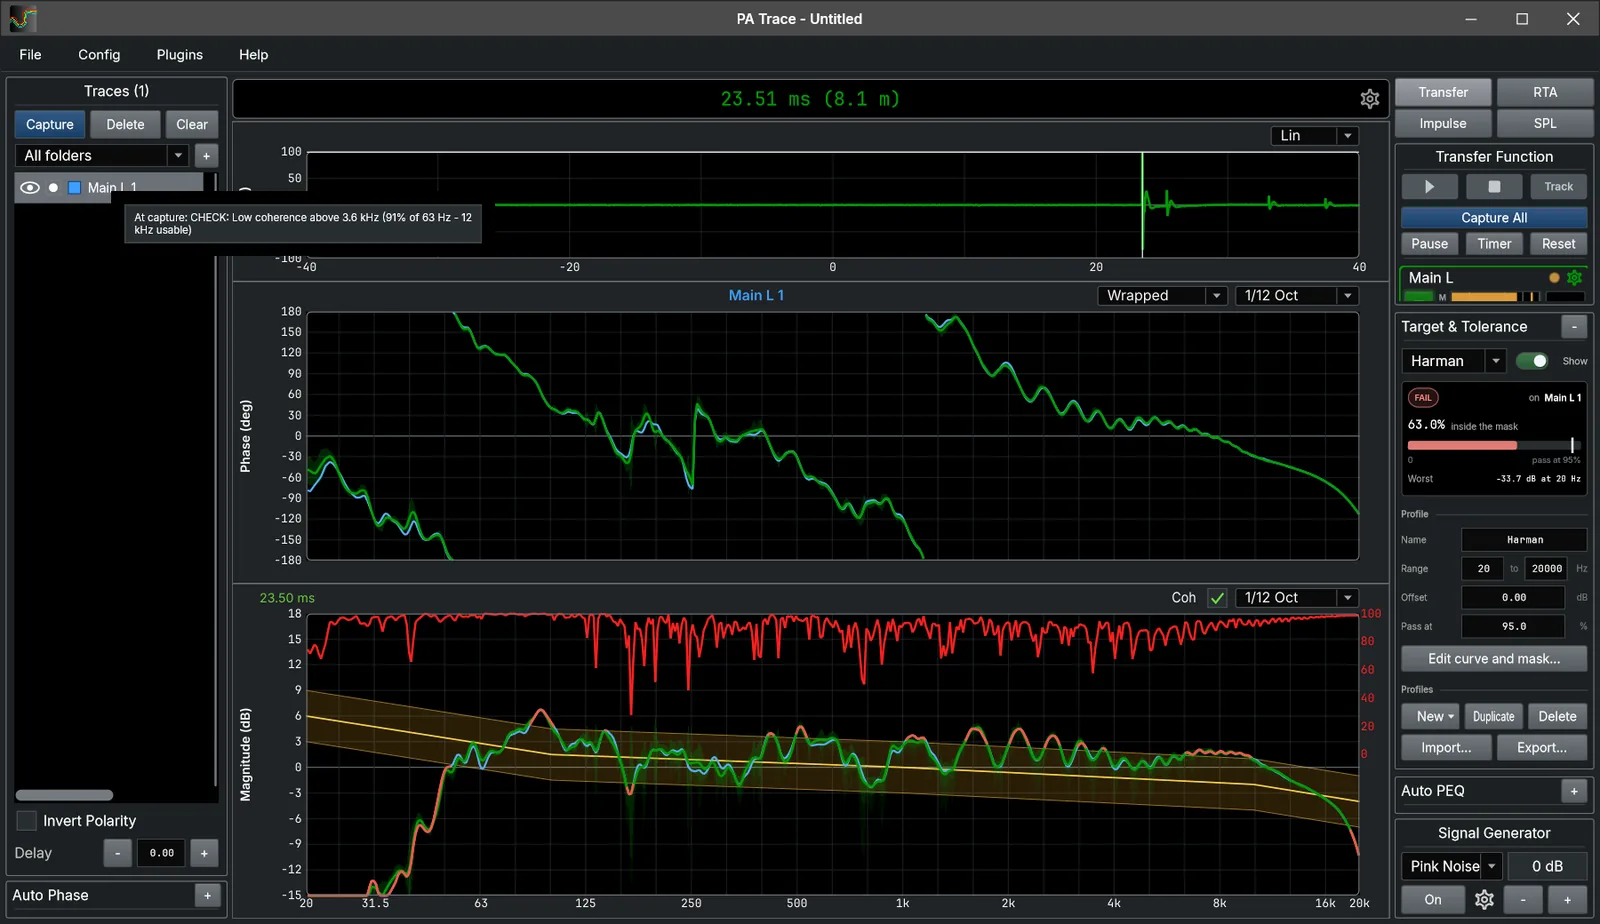
A flat transfer function is rarely what a PA should sound like. Most systems are tuned to a gentle downward tilt from the low end to the top, more pronounced in large rooms and at a distance, where the air absorbs high frequencies. A target curve with a tolerance band says when you are done, and keeps you from chasing tenths of a dB.
- Flat: the reference for checking a single box or a monitor.
- A house curve with a low-end rise and a top-end roll-off: the usual starting point for a PA.
- Your own: capture a system that sounded right and use it as the target next time.
Treat any target as a starting point. Listen with familiar material and adjust the target, not the filters, when the overall balance is not what you want.
Step 4: place the filters
- Work only where coherence is good. Low coherence means the curve there may not be real.
- Correct broad shapes first: the overall tilt and bumps an octave or wider. They respond well to EQ and are shared by every seat.
- Prefer cuts to boosts. A cut lowers a resonance; a boost spends amplifier and driver headroom, and boosting into a cancellation achieves nothing.
- Use as few filters as the job needs. Every filter you add is one more thing that is only right at the positions you measured.
- Check the phase: minimum-phase EQ changes it too. If a filter sits near a crossover, re-check the alignment afterwards.
Step 5: enter, measure again, listen
Processors differ in how they define Q, bandwidth and shelving filters, so the same numbers do not always give the same curve. After entering the filters, measure again at the same positions and compare with the captures from before. Then play music you know and walk the room. The measurement shows what to change; your ears confirm it.
Automatic EQ, used well
An automatic EQ fit is quick arithmetic, not judgment. It fits the trace it is given. Feed it an average of several positions, keep its range within good coherence, limit the boost, and read the filters before you use them. A narrow, deep dip in a single measurement is usually a cancellation that no filter can fix, and a fit that tries will waste a band on it.
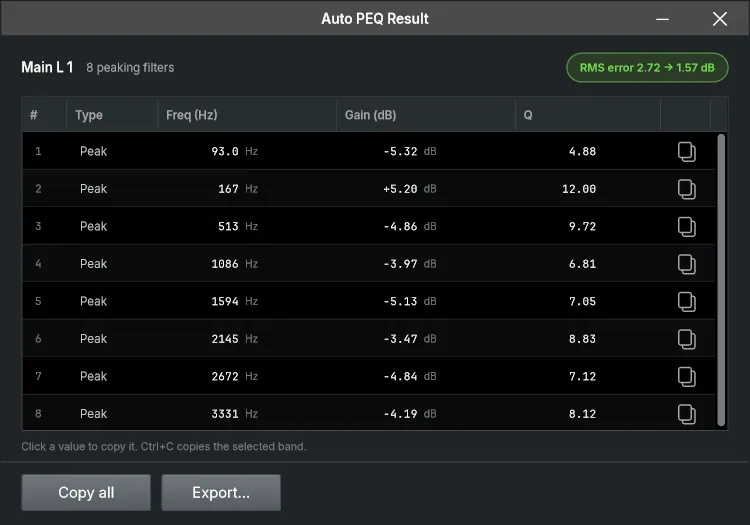
In PA Trace: Average Selected... averages captures with coherence weighting, and Add Spread Traces (±1 SD) draws where the seats disagree. Target & Tolerance compares a trace with Flat, Harman, X-Curve, B&K House or your own curve. Auto PEQ proposes 2 to 16 filters within the boost and cut limits you set; Manual EQ lets you place every filter yourself and warns where the measurement argues against it.
Related guides
- How to tune a PA system, step by step The order of work, from verifying the system to EQ and documentation.
- Coherence explained What the coherence trace means, what each pattern of low coherence points to, and how to raise it.
- Transfer function measurement, explained Magnitude, phase, coherence and the impulse response: what they are and how to read them.
- Using an RTA What a real-time analyzer is good for at a gig, from ringing out feedback to checking a mix, and what it cannot do.